
Loader
Build: 1.2.39 - Mon, 17 Aug 2026 04:15:19 GMT
Hamburger Icon WhiteHamburger Icon
Dulux TradeDulux Trade
Login/Signup
Dulux Trade
  • About Dulux
    Dulux My Home
    Dulux Specifier
    Privacy Policy
    Terms & Conditions
    Careers
  • Customer service
    Contact Us
    Shipping & Returns
    Find a Store
    Sustainability
    Media
    Dulux Group Corporate
  • Dulux in the Community
    Surf Life Saving Club project
  • © 2026 Dulux

  • Careers
  • Recommended Sites
  • Shipping & Returns
  • Terms & Conditions
  • Privacy Policy
  • Conditions of Sale
Loader

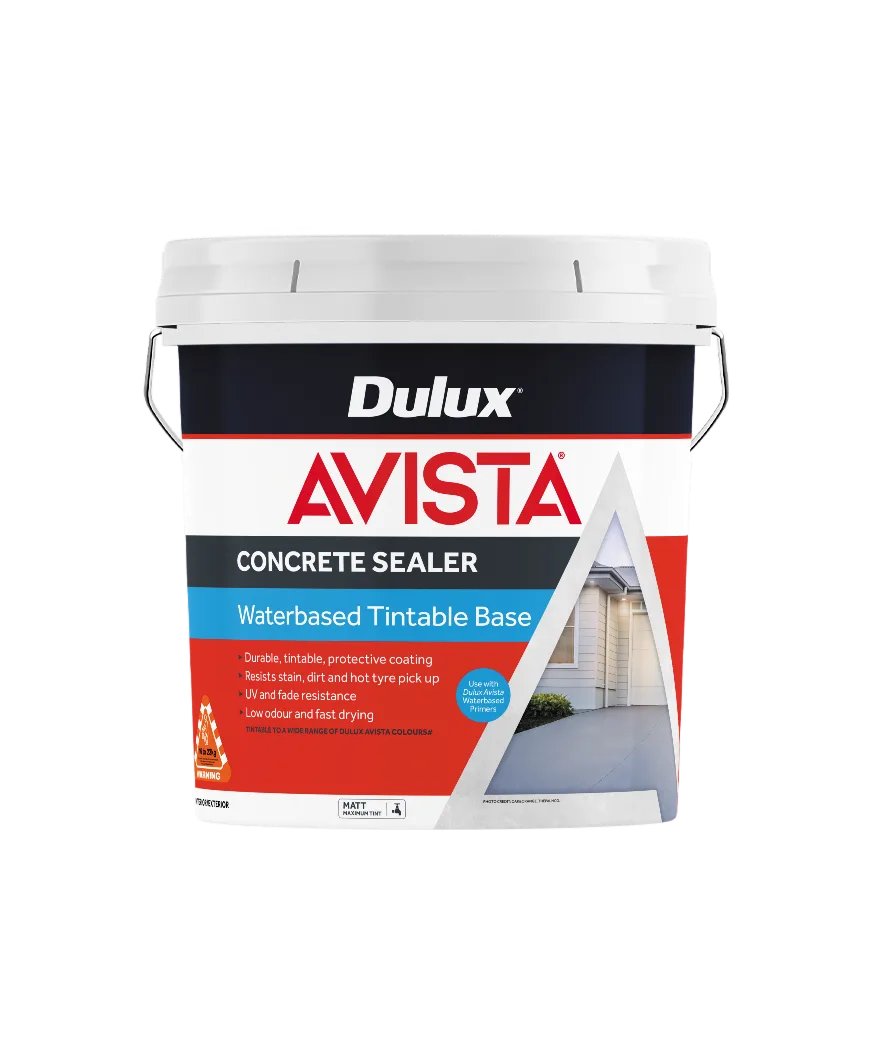
Dulux Avista

Concrete Sealer WB Tintable Matt

SALE OFF

No image preview available

SALE OFF

Dulux Avista

Concrete Sealer WB Tintable Matt

Loader
Loader

Recently viewed products

About Dulux Avista Concrete Sealer WB Tintable Matt

Dulux Avista Concrete Sealer Waterbased Tintable Sealer Matt is a premium, easy option to improve the asset's value. It should be used in conjuction with either the Dulux Avista Bare or Sealed Surface Primer.

Downloads
Key Points
  • Highly Durable
  • Interior/Exterior
  • Use on bare or sealed concrete surfaces
  • Matt Finish
  • Protection from UV, stains and dirt
  • Resists fade and yellowing
  • Resistance to marking
  • Low odour and low VOC
  • Tintable in store to wide range of colours
  • Anti slip option available
Quick guide
close

Touch Dry

30mins

close

Re-coat

1-2hours

Cleaning materials

Water

Application Tools

Roller, Brush

Product specification
Precautions and limitations

IMPORTANT NOTES FOR USE OF PRODUCT
Dulux Avista Waterbased Sealed Surface Primer is required to improve adhesion to existing acrylic resin coatings. When using on bare/unsealed concrete, Dulux Avista Waterbased Bare Concrete Primer must be applied before the Dulux Avista Concrete Sealer Waterbased Tintable Base.
Dulux Avista Concrete Sealer Waterbased Tintable Base withstands short periods of exposure to typical automotive fluids but these should be washed off promptly to avoid staining or damage. Some contaminants have an impact on the coating within a short time period and must be removed in less than one hour if they are spilt on the surface. Materials like brake fluid must be removed promptly otherwise they will permanently damage the surface.
Regular cleaning is recommended to prevent discolouration.

Surface preparation
Previously painted surface

Bare concrete surfaces

  1. Ensure concrete is fully cured (14–30 days depending on conditions) and free of grease, oil or paint. Clean surface with a commercial grade, general purpose cleaner.
  2. Acid etch using Dulux Avista Hydrochloric Acid (dilute approximately 20 parts water to 1 part acid). Pressure clean the surface before acid dries. Allow surface to dry.
  3. Pour Dulux Avista Waterbased Bare Concrete Primer into a roller tray and apply 2 even coats onto the surface using a good quality roller. Allow 1 hour between coats.
  4. Apply 2 coats of Dulux Avista Concrete Sealer Waterbased Tintable Base using a 20mm nap roller, allowing it to dry in between coats (after application of Dulux Avista Bare Concrete/Sealed Surface Primer.)

If the surface has been sealed on multiple occasions, a cross hatch test should be done to check whether the surface needs to be stripped before applying the sealer.

Unpainted surfaces

Previously sealed concrete surfaces

A cross hatch test is required if the surface has been sealed more than 2 years ago to ascertain whether existing sealer is suitable to be resealed over.

  1. Use a sharp blade to create a light “crosshatch” incision through the sealer.
  2. Place a piece of self-adhesive tape (suggest clear packing tape) over the incision.
  3. Press firmly for maximum adhesion and remove sharply. Repeat with fresh tape several times. If sealer is present on the tape, it is advised the sealer be completely stripped from surface. Seek professional contractors should stripping be required. If there is no sign of sealer adhering to the tape or delaminating from the surface, this would indicate that the bond of the existing sealer is sufficient for resealing.

Important note: If existing sealer shows signs of whitening or blooming, regardless of cross hatch test results, sealer may need to be stripped completely from the surface. Whitening may reoccur if new coat of sealer is applied over this problem.


Surfaces previously sealed with acrylic resin coatings

  1. Carry out xylene test to confirm acrylic resin coating. Check label for Dulux Avista Sealed Surface Primer or Technical Data Sheet (TDS) for instructions.
  2. Clean surface with a general purpose cleaner and allow to dry.
  3. Apply 1 coat of Dulux Avista Sealed Surface Primer using a 15mm nap roller. Allow to dry.
How to apply
Brush, Roller

Application Method

Brush (50-60mm high quality brush) and roller (20mm nap, synthetic fiber). If spraying, ensure even film build and correct spread rate. Stir thoroughly before and during use.

  1. Stir well before and during application with a broad, flat paddle using an up and down scooping action.
  2. Use a brush to apply to any edges and hard-to-reach places.
  3. Then, use a roller to apply 1ST coat of Dulux Avista Concrete Sealer Waterbased Tintable Base evenly across the surface. Work in small sections, slightly overlap the previous section to minimize raised edges, maintaining a wet edge.
  4. Lay off. Once section is coated, gently go over the surface in the same direction with an unloaded roller using minimal pressure. This will give a smooth consistent finish. Using poor quality or worn rollers can affect the final finish achieved.
  5. Allow to fully dry before applying the 2nd coat.
  6. Add the Dulux Avista Slip Reducing Additive if required by pouring the additive slowly into the sealer, while mixing with a hand paddle. Apply only into final coat of sealer. To avoid settling stir through every 2 minutes.
  7. Use 500g of Dulux Avista Slip Reducing Additive for the 15L sealer pail.
  8. Apply 2nd coat by repeating steps 2-4.

Tip: for rough concrete with peaks and dips, you may find that the sealer is difficult to apply in the dips. On the 1st coat try using the edges of the roller or a paint brush to work the sealer into dips. Allow to fully dry.

About Dulux
Dulux My Home
Dulux Specifier
Privacy Policy
Terms & Conditions
Careers
Customer Service
Contact Us
Find a Store
Sustainability
Dulux Group Corporate