
Every coatings removal project is different. To ensure that you have the correct product for yourproject it is essential to perform a test patch on all coatings that are to be removed. There are amultitude of different coatings and they all react differently to chemicals applied to them. The onlyfast and reliable method for determining which product will be most effective is to apply a test patch.
Cleaning materials
Water
Application Tools
Trowel- plastic scraper enclosed
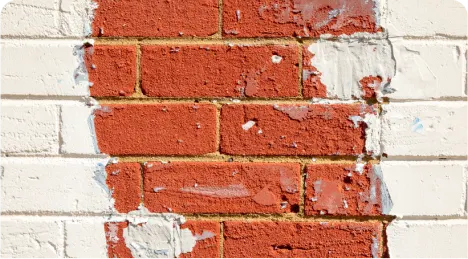
Apply each product in a 20cm x 20cm test area. Repeat this process 3 times for each product.Ensure that you apply each product for the specified minimum at each dwell time and that the productis applied at the correct thickness. Refer to instructions enclosed in test patch kit for minimum film build and dwell times.Apply the enclosed Dulux PRECISION Paper, printed side out, over the Coatings Remover patchesand smooth out to remove air. Tape down all edges to protect from accidental transfer to personnelin the area or the possibility of inclement weather.On the first test patches note down in a permanent marker ‘24 hours’. On the second set note down48 hours’ and on the last ‘72 hours’. You can make these recordings directly on the paper.Be sure to take note of all specific information during the test patch: dwell time, temperature, humidityand weather conditions. During the future coatings removal project, this information will be veryimportant for project effectiveness. You can record this information directly on the paper print design. After 24 hours of dwell time you can begin checking the results of the first set of test patches. Puton rubber gloves and using the scraper, gently scrape under the remover and Dulux PRECISION paperstarting at the corner. Carefully lift the scraper, paper, coatings remover and paint in one continuousmotion. Once the coating has been removed, immediately scrub the surface (using the scouring padsprovided and water). Contain all remnants and dispose of responsibly. Surface should now be cleanand free of paint film.If the coating has not been removed entirely, you will need to wait for the 48 hour or 72 hour testpatch results. Product efficacy depends on proper film build and the dwell interval.
